

The Oracle Database Connector is an API App which allows users to perform CRUD operations towards an on-premises Oracle Database Server. Although the connectors primary role is to be used as part of a Logic App, you can also consume it as a REST API service. When implemented as part of a Logic App, it can be used as a trigger or as an action.
The connector supports the following Oracle operations:
* Table operations: insert, update, delete
* Stored Procedures
* Functions
* Package Entities
In order to successfully create and configure the Oracle Database Connector, the following prerequisites should be taken into account:
* On-Premises Oracle Database Server (using Service Naming method)
* Azure Resource Group
* Azure Service Bus
This post will focus on creating the Azure Resource Group, Service Bus and finally the actual Oracle Database Connector.
On-Premises Oracle Database Server
Although this post will not go into details on how to install and configure an Azure Oracle Database environment, it’s worth mentioning that we tested the Adapter on the following Oracle versions:
* Oracle Database 11g Release 2 (Standard Edition)
* Oracle Database 12c Release 1 (Standard Edition)
A dedicated uses was created to allow authentication by the connector.
Azure Resource Group
A resource group is a container hosting one or multiple resources allowing them to share a common lifecycle. It enables users to set access control policies for the specific container and view billing information of all resources within the resource group container.
It is not mandatory to create a Resource Group in advance. Most Azure components allow you to create new Resource Group at design time.
Resource groups are only available through the new Azure portal, so in order to create a new Resource Group, browse to http://portal.azure.com and login to your Azure subscription.
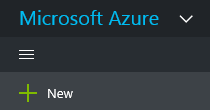
Click the “New”-button from the left-hand menu and type “Resource Group” in the search-box.
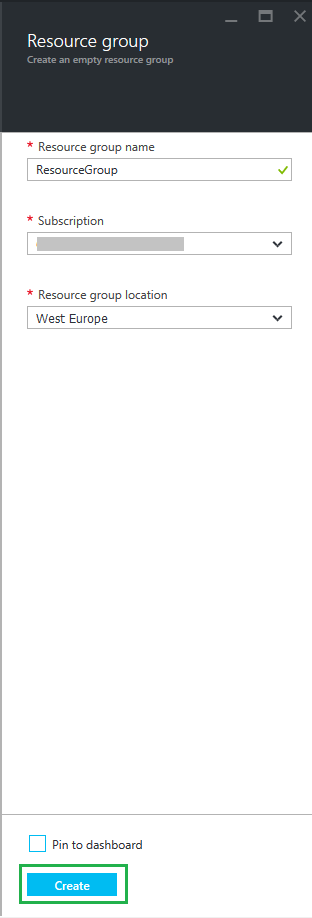
Select “Resource Group” in the result list, this will open a new slice on the right. Click “Create”.
Fill in a “Resource Group Name” and select your desired Subscription and Resource Group Location. Complete by clicking “Create”.
Azure Service Bus
The “Oracle Database Connector” connects to an on premise oracle environment through the use of a Hybrid Connection. This Hybrid Connection makes use of the Relay Service, requiring an active Azure Service Bus.
Create and configure Azure Service Bus
The new Azure-portal doesn’t support creation of service bus services at this moment, so browse to http://manage.windowsazure.com and login to your Azure subscription.
From the left-hand menu, select “Service Bus”.
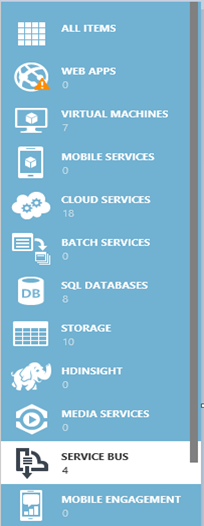
Select “CREATE” from the bottom menu.

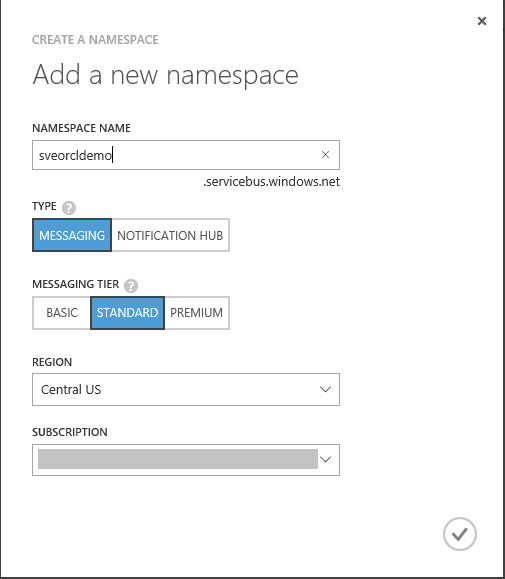
Fill in the required information in the “Create a namespace”-form, providing your new Service Bus namespace name. Make sure to use the “STANDARD”-messaging tier. As stated earlier, the Oracle Adapter will need “Relay Services” to create a hybrid connection to an on premise oracle environment. Relay Services are only available in the “STANDARD” or “PREMIUM” messaging tier.
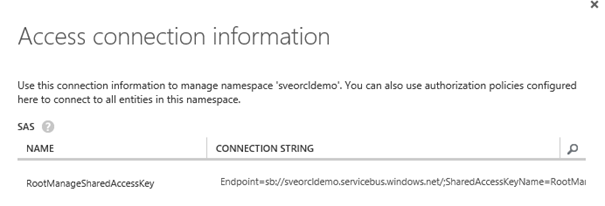
Service Bus connection string
During creation of the “Oracle Database Adapter”, a Service Bus connection string will have to be entered. To retrieve this connection string after creation of the Service Bus, select “Connection Information” from the bottom menu after selecting the newly created Service Bus.

Copy the connection string for “RootManageSharedAccessKey”
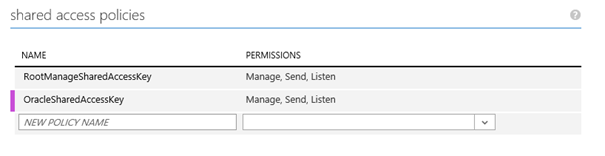
Additional Shared Access Policies can be created when needed. However, this is optional. To create a new Shared Access Policy, select your newly created Service Bus and click “CONFIGURE” from the top menu.

Create a new policy under “shared access policies” and set the permissions. Since the “Oracle Database Connector”-deployment will create a new relay service, it is required to set “Manage”-permissions for your new policy.
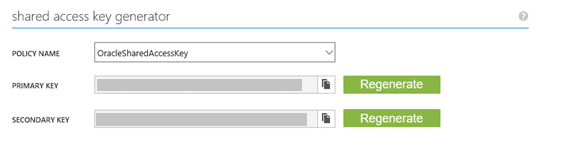
Click “Save” in the bottom menu to apply the changes. After the changes have been applied, the “OracleSharedAccessKey”-policy will be available in the “Policy Name” under “shared access key generator”, allowing you to use a different set of key’s.
Oracle Database Connector
Deployment
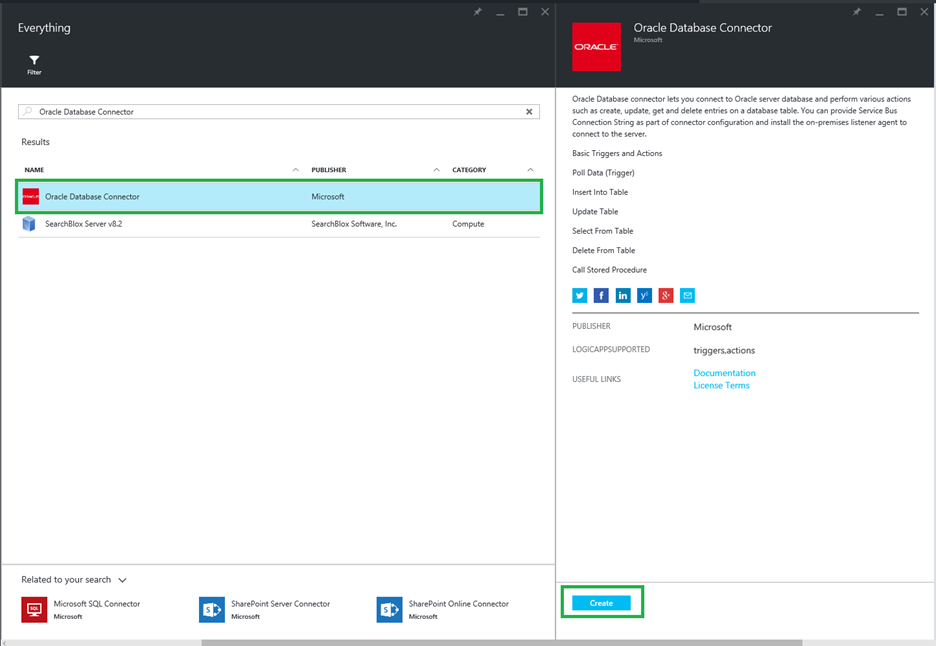
Browse to http://portal.azure.com and login to an active Azure subscription. Click “New” in the left-hand corner.

In the Search-box, type “Oracle Database Connector”. In the result list, click on “Oracle Database Connector”, followed by clicking on “Create” in the “Oracle Database Connector”-slice that opened.
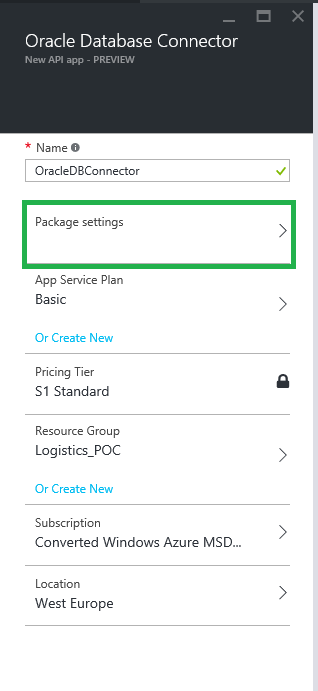
In the “Oracle Database Connector”-configuration slice, fill in a Name for your connector and select “Package Settings”
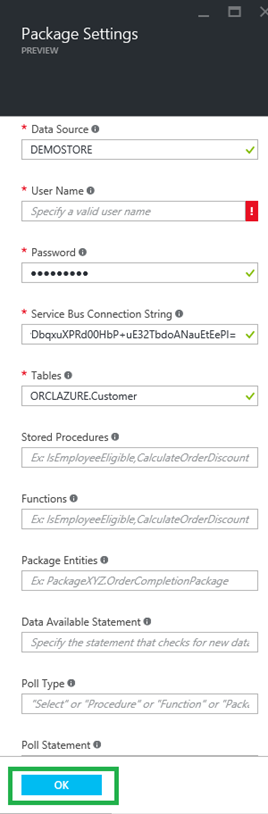
In the “Package Settings”-slice, fill in all required information. For the demo, required fields are:
* Data Source: Oracle Service Name of the database as configured on the on premise server. This service name can be found in the tnsnames.ora of your Oracle-environment
* User Name: Oracle User Name to open a connection to the on premise Oracle database
* Password: password for the Oracle User
* Service Bus Connection string: Connection string of the service bus. Required to create a Relay Service used by the Hybrid Connection to establish a connection between the Oracle Database Connector and the on premise Oracle server.
* Tables: list of tables on which CRUD-permissions will be granted to the Oracle Database Connector.
In order to use the Oracle Database Connector as trigger in a Logic App, it’s required to provide the following settings
* Data Available Statement
* Poll Type
* Poll Statement
* Post Poll Statement
For this tutorial, we did not provide this information.
In the “Oracle Database Connector”-slice, select an existing App Service Plan or create a new one. Continue by selecting a “Pricing Tier”.
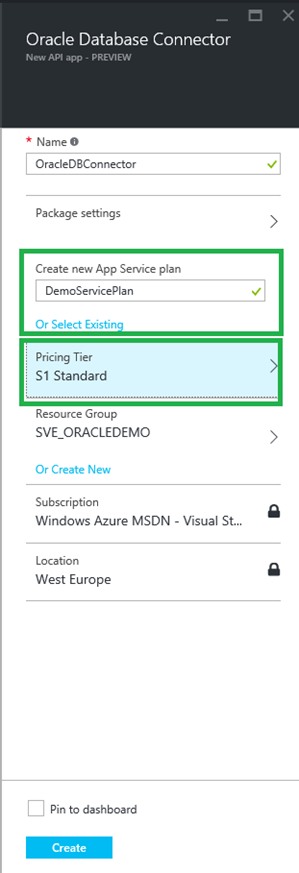
Finally, select an existing or create a new “Resource Group” and finish by clicking “Create”.
Hybrid Connection
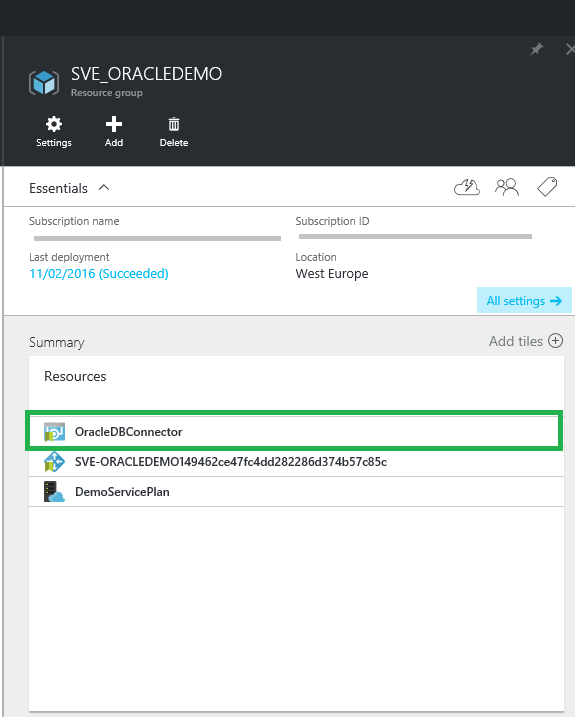
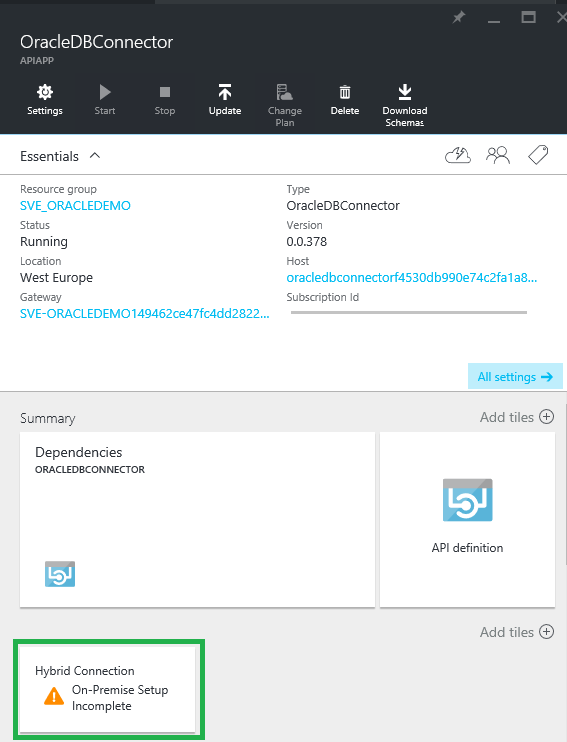
After deployment of the “Oracle Database Connector”-connector completed, open the connector from the Resource Group.
In the “OracleDBConnector”-slice, click on the “Hybrid Connection”-tile to open the “Hybrid Connection”-properties.
In the “Hybrid Connection”-properties, click “Download and configure” to start the download of the “Hybrid Microservices”-application and continue by clicking “Install”. Copy the “PRIMARY CONFIGURATION STRING” as well.
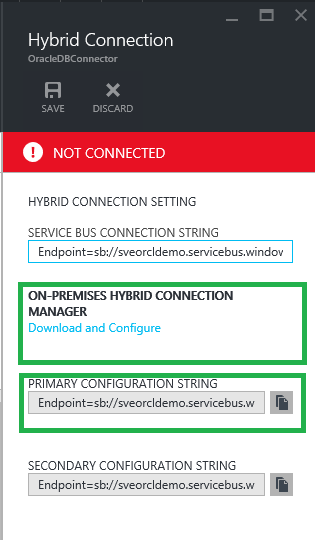
Clicking “Download and Configure” will open a client installer. Continue by clicking “Install”.

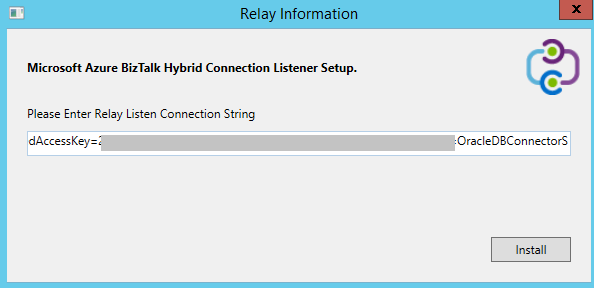
When prompted to enter the “Relay Listen Connection String”, paste the “PRIMARY CONNECTION STRING” which you copied earlier.
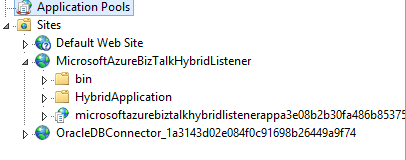
When the installer completed, you will notice that 3 new sites, as well as 3 new application pools, have been added to IIS of your on-premises environment.

After installation and configuration of the Hybrid Connection, the status in the “OracleDbConnector” will change, however this can take some time and might require you to closing and re-opening the connector window:
The “Oracle Database Connector” is now created and ready for use.
Post Installation Notes
When I first tried to retrieve the API Definition for the connector, I received the following error:
Failed to get metadata for ‘DEMOSTORE’ from endpoint ‘/$metadata’: Failed status code: ‘InternalServerError’. Response Body: ‘{ “status”: 500, “source”: “https://oracledbconnectorf5b5a…“, “message”: “An error has occurred.” }’.
I struggled a bit with identifying the root cause of this error, but then I remembered the Hybrid Connection installed a couple of sites in IIS.
I opened the web.config of the “OracleDbConnector_[guid]”-site and noticed that CustomErrors were enabled.

After turning off the customErrors, I was able to receive the fully details error of my connector, stating the following:
“Could not load file or assembly ‘Oracle.DataAccess’ or one of its dependencies. An attempt was made to load a program with an incorrect format.”
I fixed this by copying the file “Oracle.DataAccess.dll” from $YOURORACLE_HOMEFOLDER$/product\$VERSION$\$dbhome$\ODP.NET\bin\4 to folder “C:\Microsoft Azure Hybrid Connectors\$GUID$\OracleDBConnector.0.0.378\content\bin”.
Stay tuned if you are interested to get more “Oracle Database Connector”-insigths, as we’ll go further into the usage of the connector in a follow-up post shortly.


29 en 30 oktober 2025 Deze 2-daagse cursus is ontworpen om dataprofessionals te voorzien van de kennis en praktische vaardigheden die nodig zijn om Knowledge Graphs en Large Language Models (LLM's) te integreren in hun workflows voor datamodel...
3 t/m 5 november 2025Praktische workshop met internationaal gerenommeerde spreker Alec Sharp over het modelleren met Entity-Relationship vanuit business perspectief. De workshop wordt ondersteund met praktijkvoorbeelden en duidelijke, herbruikbare ri...
17 t/m 19 november 2025 De DAMA DMBoK2 beschrijft 11 disciplines van Data Management, waarbij Data Governance centraal staat. De Certified Data Management Professional (CDMP) certificatie biedt een traject voor het inleidende niveau (Associate) tot...
25 en 26 november 2025 Worstelt u met de implementatie van data governance of de afstemming tussen teams? Deze baanbrekende workshop introduceert de Data Governance Sprint - een efficiënte, gestructureerde aanpak om uw initiatieven op het...
26 november 2025 Workshop met BPM-specialist Christian Gijsels over AI-Gedreven Business Analyse met ChatGPT. Kunstmatige Intelligentie, ongetwijfeld een van de meest baanbrekende technologieën tot nu toe, opent nieuwe deuren voor analisten met ...
8 t/m 10 juni 2026Praktische driedaagse workshop met internationaal gerenommeerde spreker Alec Sharp over herkennen, beschrijven en ontwerpen van business processen. De workshop wordt ondersteund met praktijkvoorbeelden en duidelijke, herbruikbare ri...
Alleen als In-house beschikbaarWorkshop met BPM-specialist Christian Gijsels over business analyse, modelleren en simuleren met de nieuwste release van Sparx Systems' Enterprise Architect, versie 16.Intensieve cursus waarin de belangrijkste basisfunc...

Deel dit bericht