

A couple of years ago, I was present at TechEd Europe 2014 for the launch of Windows Azure Pack. This version was built to give the same experience as the first version of Azure (now known as the classic portal). A big challenge was getting started with the Windows Azure Pack: you had to install the infrastructure layer (like Windows/SQL/SCVMM/SCSMA/SCSPF/WAP) before you could start deploying anything. Not only do you have to deploy these layers, you also need to update and maintain them.
At Ignite 2017, Microsoft released the second version of their cloud platform, Microsoft Azure Stack (MAS). MAS was built on the new Azure – Azure Resource Manager – technology. So Microsoft has made it possible to run your Azure environment onsite, getting “almost” the same services that are in Azure. The services available can be found here.
Azure Stack or Azure Stack Development Kit
There are two different versions of Azure Stack. You can use the official version, which can be bought through one of these partners, or you can download the Azure Stack Development Kit (ASDK) and try Azure Stack for free before you buy. You can’t run production load on the ASDK, and it needs to be reinstalled to get the latest version of Azure Stack. To get the most out of ASDK, first make sure your system is properly set up to meet the hardware and deployment requirements. The ASDK is a single-node deployment of Azure Stack. All components are installed on virtual machines running on a single host machine.
Installation of the Azure Stack Development Kit
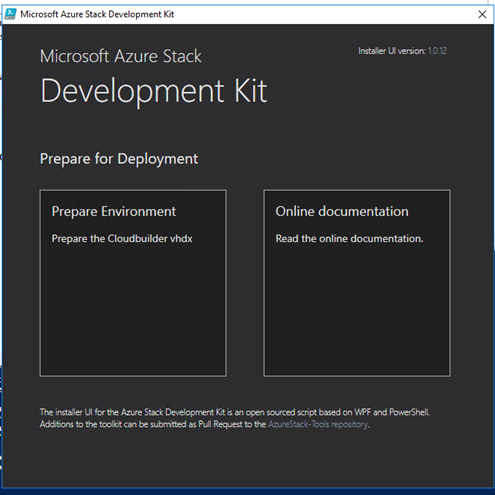
Full installation instructions for the ASDK can be found here. First, you start with a default installation of Windows Server 2016. After downloading the files for the ASDK here, you’ll need to extract them on the installed host. You’ll also need to download the installer: this script will ensure you will reboot from the ASDK VHD (Virtual Hard Disk). After rebooting from within the downloaded image, you’ll need to rerun the same script to start the installation of the ASDK.
After installation you will see the text “COMPLETE: Action ‘Deployment’”.
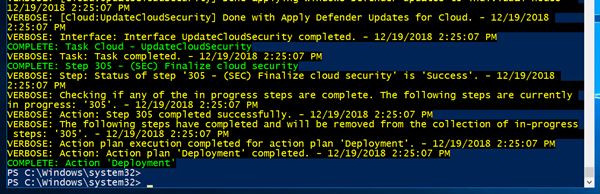
You now have a running Azure Stack Development Kit.
After installation
Once you’ve installed the ASDK, you’ll need to configure the ASDK to facilitate different payloads. By default, you can only run a small number of payloads on the Azure Stack. You’ll need to add additional functionality manually; detailed information about this can be found here.
I recommend that you at least do the Marketplace Syndication: this is the easiest way to get additional functionality.
Marketplace
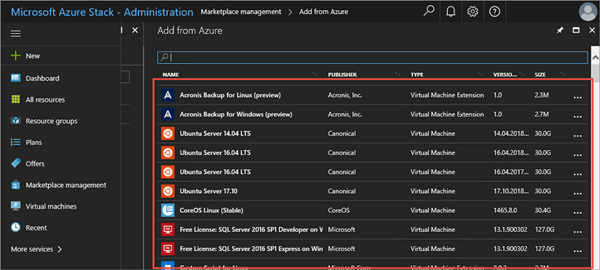
One of the ways to get more content to be used on your Azure Stack Development Kit is by registering your ASDK with Azure, after which you will be able to download content directly from Azure to your ASDK.
“The Azure Stack Marketplace is a collection of services, applications, and resources customized for Azure Stack. Resources include networks, virtual machines, storage, and more. Use the Marketplace to create new resources and deploy new applications; or browse and choose the items you want to use. To use a Marketplace item, users must subscribe to an offer that grants them access to the item.” (source: Microsoft.com).
SQL databases
Use the SQL Server resource provider adapter to offer SQL databases as a service of Azure Stack. After you install the resource provider and connect it to one or more SQL Server instances, you and your users can create:
• Databases for cloud-native apps
• Websites that use SQL
• Workloads that use SQL.
The resource provider doesn't provide all the database management abilities of Azure SQL Database. For example, elastic pools that automatically allocate resources aren't supported. However, the resource provider supports similar create, read, update, and delete (CRUD) operations on a SQL Server database.
MySQL databases
MySQL databases are common on websites and support many website platforms. For example, you can create WordPress websites using the Web Apps platform as a service (PaaS) add-on.
After you deploy the resource provider, you can:
• Create MySQL servers and databases using Azure Resource Manager deployment templates
• Provide MySQL databases as a service.
Azure App Service
Azure App Service on Azure Stack is a platform-as-a-service (PaaS) offering of Microsoft Azure available on Azure Stack. The service enables your internal or external customers to create web, API, and Azure Functions applications for any platform or device. They can integrate your apps with on-premises applications and automate their business processes. Azure Stack cloud operators can run customer apps on fully managed virtual machines (VMs), with their choice of shared VM resources or dedicated VMs.
Azure App Service enables you to automate business processes and host cloud APIs. As a single integrated service, Azure App Service lets you combine various components, such as websites, REST APIs, and business processes, into a single solution.
Azure Stack Development Kit Configurator
There is also another way to populate your ASDK environment, using a script created and updated by Matt McSpirit. This script can be downloaded from Github. After downloading, when run the script will do the following (this list may change in line with ongoing changes to the script):
• Install Azure Stack PowerShell and AzureRM modules
• Tool installation (Azure Stack Tools)
• Register the ASDK with Azure (optional - enable Marketplace Syndication)
• Add Windows Server 2016 Datacenter Evaluation (Full + Core) images to the Platform Image Repository
• Add Ubuntu Server 16.04-LTS image to the Platform Image Repository
• Create Gallery item for MySQL 5.7 and SQL Server 2017 (both on Ubuntu Server 16.04 LTS)
• Automate the addition of Microsoft VM Extensions to Gallery from Marketplace (for registered ASDKs)
• Install MySQL Resource Provider
• Install SQL Server Resource Provider
• Automate deployment of the latest App Service release using dynamically constructed JSON
• Configure Python & Azure CLI for use with ASDK
And much more.
To wrap it up
Installation of the ASDK is done (for now). There are two ways of connecting to the ASDK environment. You can either access the stamp over a regular RDP connection, or you can create a VPN connection to the stamp and start deploying on it. Both ways are described here.
After connection you can access the following links and start using your ASDK:
• https://portal.local.azurestack.external
• https://adminportal.local.azurestack.external
The next blogs will deal with maintaining the Azure Stack.
Craft Expert Eelco Labordus is werkzaam bij Centric en actief als Craft Expert.
Deze blog verscheen eerder op www.centric.eu/craft.


29 en 30 oktober 2025 Deze 2-daagse cursus is ontworpen om dataprofessionals te voorzien van de kennis en praktische vaardigheden die nodig zijn om Knowledge Graphs en Large Language Models (LLM's) te integreren in hun workflows voor datamodel...
3 t/m 5 november 2025Praktische workshop met internationaal gerenommeerde spreker Alec Sharp over het modelleren met Entity-Relationship vanuit business perspectief. De workshop wordt ondersteund met praktijkvoorbeelden en duidelijke, herbruikbare ri...
17 t/m 19 november 2025 De DAMA DMBoK2 beschrijft 11 disciplines van Data Management, waarbij Data Governance centraal staat. De Certified Data Management Professional (CDMP) certificatie biedt een traject voor het inleidende niveau (Associate) tot...
25 en 26 november 2025 Worstelt u met de implementatie van data governance of de afstemming tussen teams? Deze baanbrekende workshop introduceert de Data Governance Sprint - een efficiënte, gestructureerde aanpak om uw initiatieven op het...
26 november 2025 Workshop met BPM-specialist Christian Gijsels over AI-Gedreven Business Analyse met ChatGPT. Kunstmatige Intelligentie, ongetwijfeld een van de meest baanbrekende technologieën tot nu toe, opent nieuwe deuren voor analisten met ...
8 t/m 10 juni 2026Praktische driedaagse workshop met internationaal gerenommeerde spreker Alec Sharp over herkennen, beschrijven en ontwerpen van business processen. De workshop wordt ondersteund met praktijkvoorbeelden en duidelijke, herbruikbare ri...
Alleen als In-house beschikbaarWorkshop met BPM-specialist Christian Gijsels over business analyse, modelleren en simuleren met de nieuwste release van Sparx Systems' Enterprise Architect, versie 16.Intensieve cursus waarin de belangrijkste basisfunc...

Deel dit bericht